If you are using WooCommerce to build your WordPress eCommerce website, you should definitely use the variable product feature of this plugin. This feature is very useful because it helps you add a set of variations to a product. Therefore, it is more flexible and convenient for you to manage your sales items.
Still, confused about what a variable product is? Look at the following example:
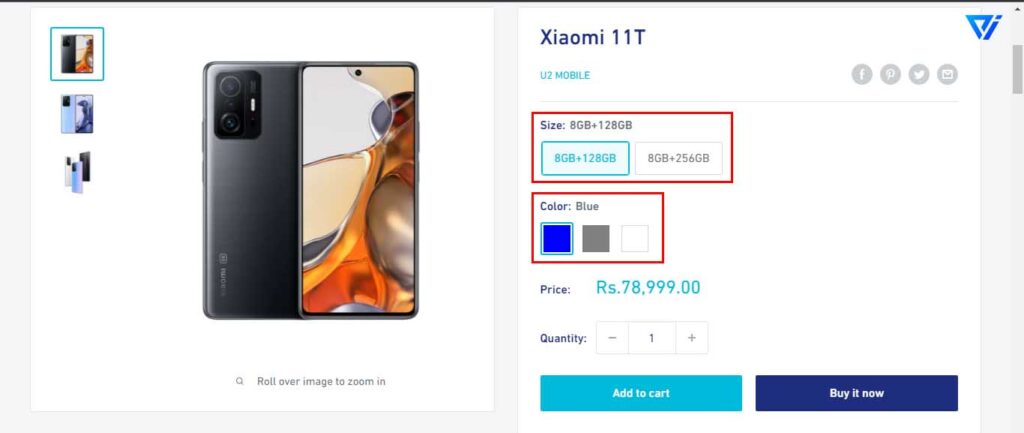
Assuming you sell phones and each type of phone has different colors and capabilities, so the price is not the same. So instead of adding separate products for each color and capacity, you can offer a bunch of variations for ONLY ONE product (it’s called a variable product). Each version is distinct in terms of color, capacity, and price. It seems more professional, right?
We’ll walk you through every step of the way (step by step). But first, make sure you have installed and activated the WooCommerce plugin from wordpress.org.
Table of Contents
Related
Step 1: Add attributes to use in variations
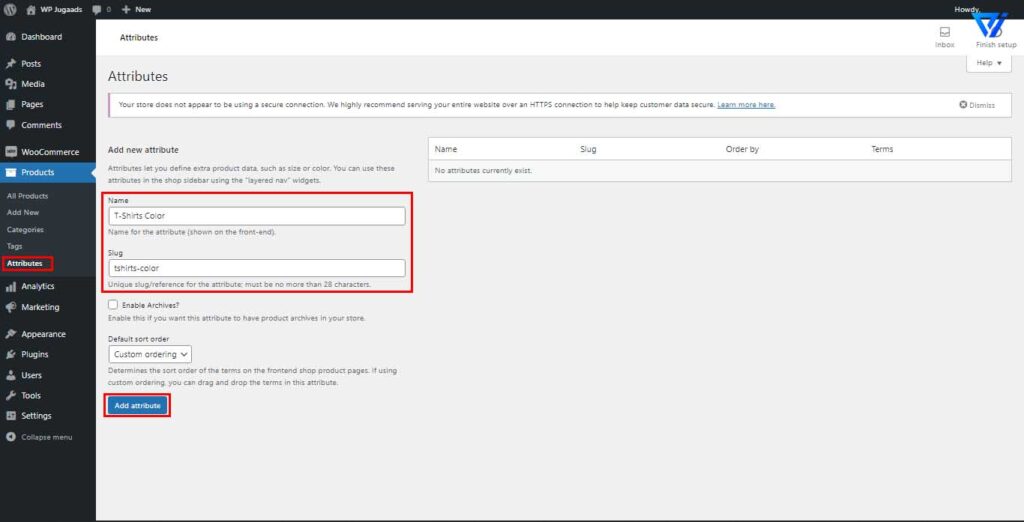
As in the example above, I will add two attributes to use in my product (T-Shirt) which are Color and Size.
Go to Product> Attributes, fill in the product name and slug, and then click Add Attribute.
And then to add values for these two attributes (different colors and sizes), click Configure terms on each attribute.
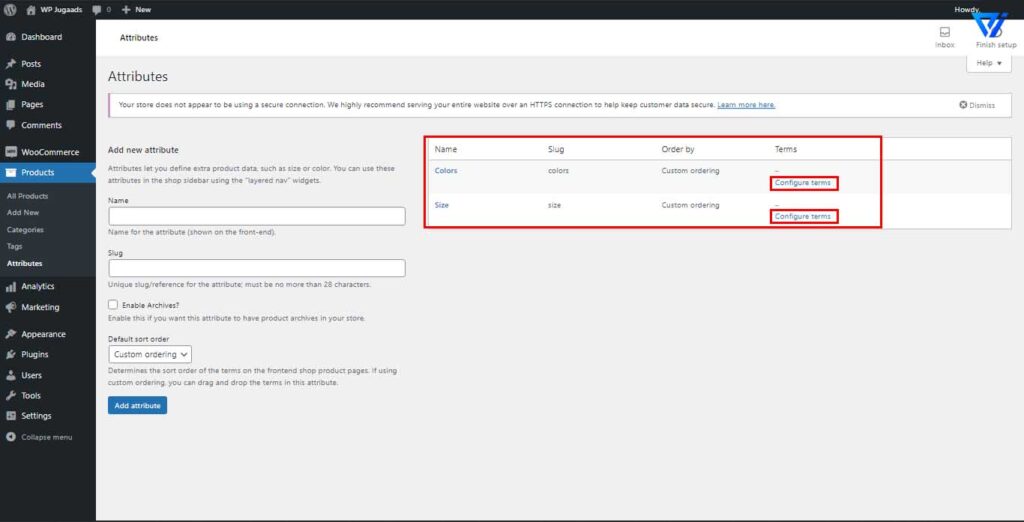
I added several varieties of color and size for the product in the same way that I introduced characteristics.
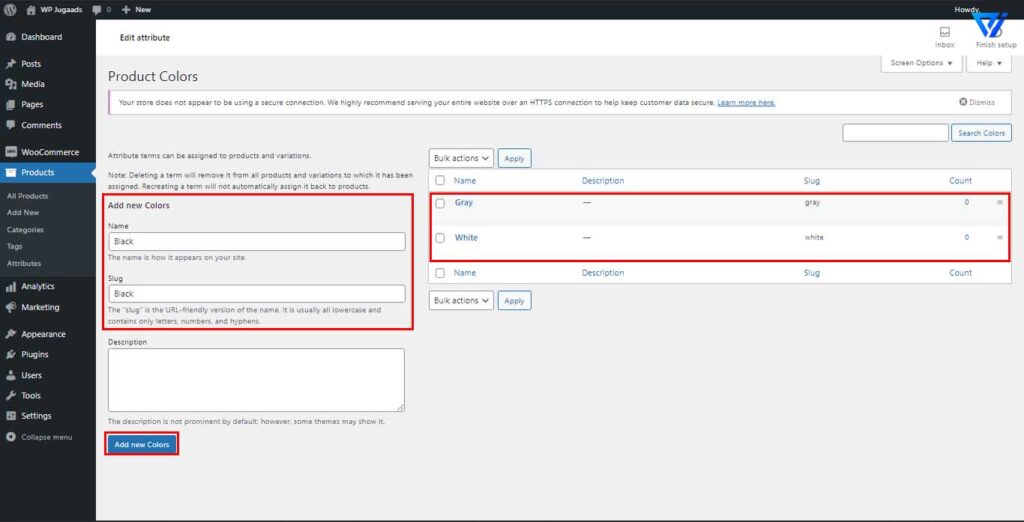
That is done! We add different attributes to use in the product. Now go to step 2.
Step 2: Give the product unique characteristics.
You must first create a new product page.
In the Admin Panel, navigate to the Product section just below the WooCommerce section and then click Add New. On the Add New Product screen, fill in the required information for the product.
Then scroll down to the Product Data section, choose Variable Product.
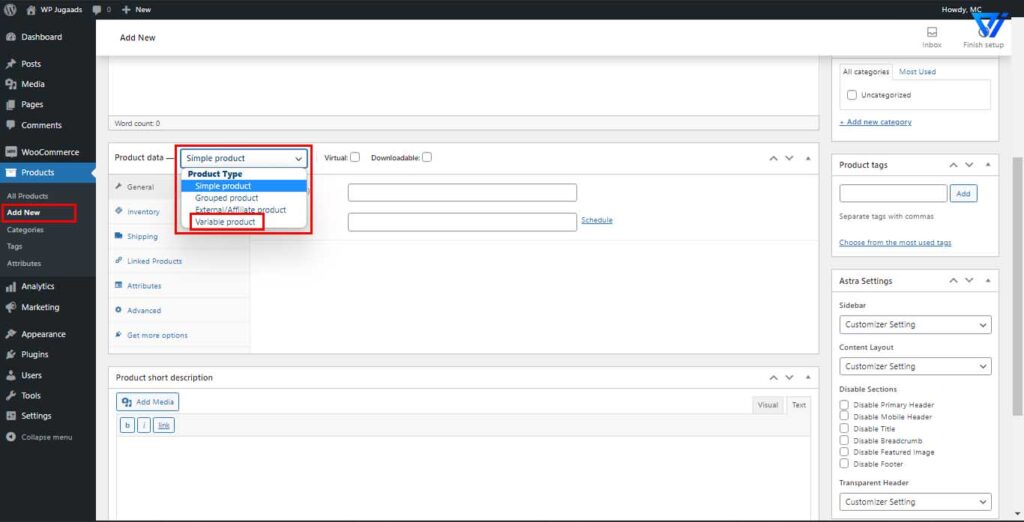
Choose the variable product
Go to the Attributes tab, click Custom Product Attributes. You may now add the properties you created in step 1 to the product page in this area. This can easily be done by choosing the required attributes from the drop-down menu and then clicking Add.
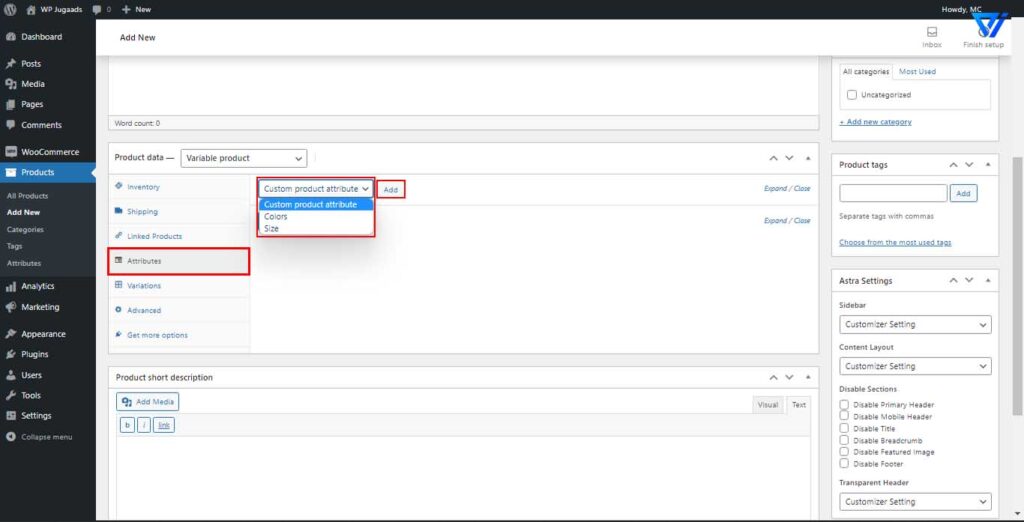
After adding two attributes (Color and Size) to the product, the interface looks like this:
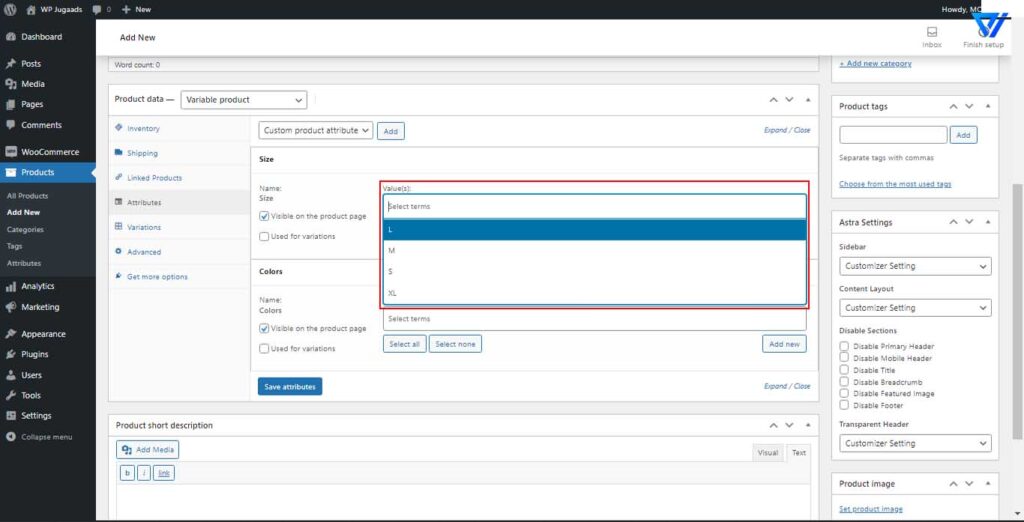
Then I’ll add values (different colors, sizes) for these two attributes above. You can easily do this by clicking Select Items and choosing the values.
After adding values for the attributes, note that you MUST check the Used for variations box. It is mandatory and very important because only then will you be able to use the variations for the product.
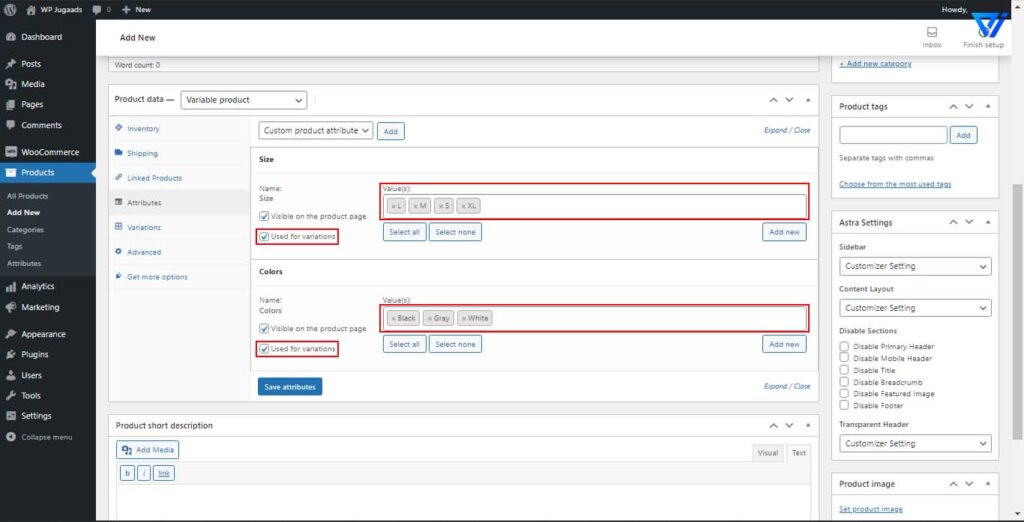
Lastly, don’t forget to click Save Attributes.
Step 3: Add variations for the products
When customizing the product attributes, you must add the variations for the product. These versions are made up of different attribute values, such as a black T-Shirt with Large Size, a Grey T-Shirt with Medium Sizes, and so on.
Still on-screen in step 2, go to the Variations tab and click Add Variation> Create Variations of All Attributes> Go.
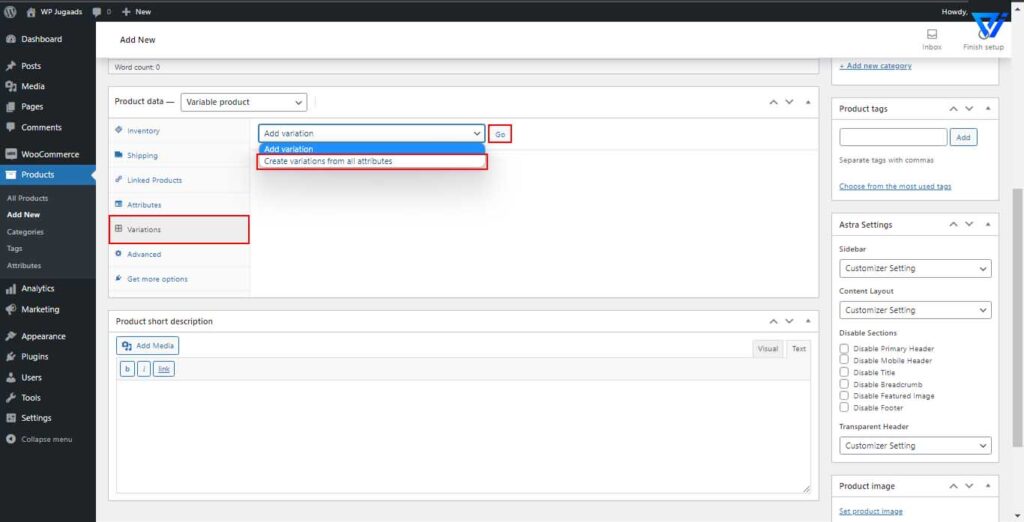
Wait a few seconds, the variations will be displayed as follows:
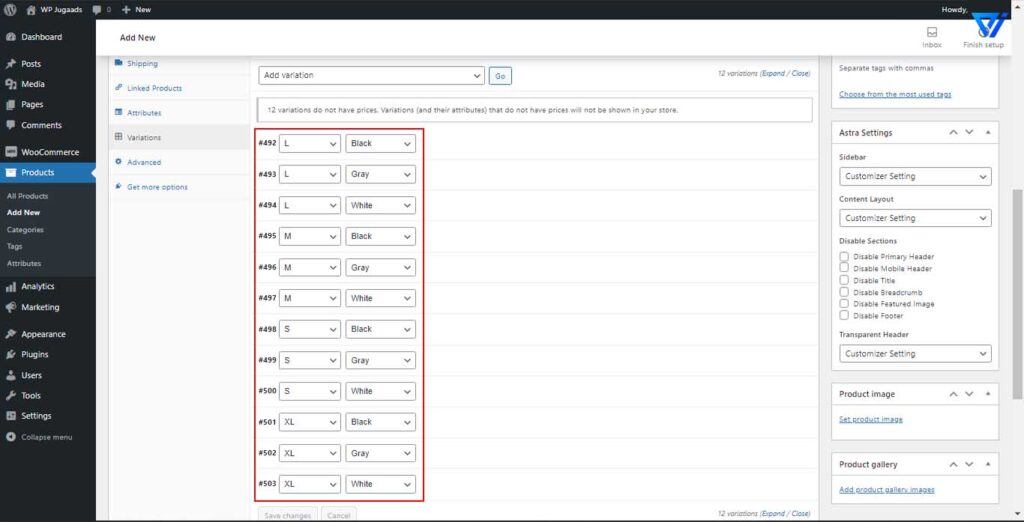
After adding information for all variations, be sure to save and publish the product.
Everything is done! You have finished adding a variable product in WooCommerce.
Wrapping Up
The WooCommerce plugin has many useful functions that you can use to make your business prosper. And the variable product function is just one of them. Also, if you want to add special information that WooCommerce doesn’t support by default, check out this article on how to add custom fields for WooCommerce. Wishing your business is yes! successful and prosperous company!


